Interior Painting: From Prep to Finish
On any given street in Evesham, NJ, you can spot the difference between a quick DIY paint job and a professionally finished interior the moment you walk through the door. Colors might look similar, but the details tell the real story: smooth walls, crisp lines, and a finish that still looks fresh years later. According to industry surveys, up to 70% of homeowners say a recent paint project didn’t turn out quite how they imagined—usually because the prep work wasn’t done right.
For homes and businesses across South Jersey, interior painting isn’t just about changing a color. It’s about protecting your property, enhancing value, and creating a space that feels good to live or work in. In a competitive local housing market like Evesham and the surrounding townships, a well-executed paint job can be the difference between “nice place” and “wow.”
You’re going to see what it really takes to move from bare or damaged walls to a durable, beautiful finish. From inspection and prep, to product selection, to the final coat, this guide walks you step by step through the full interior painting process—so you can recognize quality work, avoid common pitfalls, and know when it’s time to call in a professional.
Key Insight: The quality of an interior paint job is decided long before the first brush hits the wall. Careful prep, smart product choices, and disciplined application are what create a finish that looks great and actually lasts.
Step 1: Assessing Your Space and Planning the Project
The best interior transformations in Evesham start long before paint cans show up. A thorough assessment helps you make smart decisions about scope, budget, and timing.
A professional crew will begin by walking through each room with you and asking:
- Are there cracks, nail pops, or stains on the walls or ceilings?
- Do you have any moisture issues (especially in bathrooms or basements)?
- Are you planning other work—like Trim and Door Installation or new flooring—that should be sequenced with painting?
- How will each room be used (high-traffic, kids, pets, office, etc.)?
In South Jersey, it’s common to see settlement cracks and tape seams in older homes, and a lot of textured ceilings from past decades. These conditions directly affect the prep process and the products chosen.
Example from Evesham:
A family in Kings Grant called Bucci Paint for a “simple repaint” of their living room. During the walkthrough, our team noticed multiple hairline cracks and a few suspicious stains on the ceiling near an HVAC vent. Instead of just painting over them, we investigated, found a minor condensation issue, coordinated a fix, and then repaired and primed the area. Had we skipped that step, the new paint would have failed within a year.
“A paint job is only as good as what’s underneath it.” — Bucci Paint Lead Estimator
CALLOUT: A detailed assessment and written plan at the start prevents surprise costs and delays later. Don’t skip this step, even for a single room.
Step 2: Surface Prep – The Hidden Work That Makes All the Difference
Ask any seasoned painter in Evesham what separates a professional project from a weekend DIY job, and you’ll hear the same answer: prep. It’s not glamorous, but it’s where most of the quality is built.
Thorough prep for Interior painting typically includes:
- Protecting floors, furniture, and fixtures with plastic, paper, and drop cloths
- Removing switch plates, outlet covers, and vent grilles
- Cleaning greasy or dusty surfaces (especially in kitchens and near HVAC returns)
- Scraping any loose or peeling paint
- Repairing holes, cracks, and failing tape joints
- Sanding patched areas smooth and feathering edges
- Spot-priming repairs and stains
In many South Jersey homes, drywall issues are common—especially in finished basements and additions. That’s where integrated services like Drywall Install and Repair truly matter. Instead of just “spackling it quick,” a professional will:
- Cut out failed or soft drywall
- Replace or patch with proper backing
- Tape, mud, and sand in multiple coats
- Prime with the right sealer before painting
Local case study:
A homeowner in Marlton Lakes wanted to refresh their downstairs after a small plumbing leak. They’d had the leak fixed, but the previous painter just painted over the stained, slightly bubbled drywall. Within months, the stain bled through and the surface looked worse than before. Our crew removed the damaged section, installed new drywall, taped and skimmed, then sealed with a stain-blocking primer. The new finish has held up perfectly through multiple seasons of humidity.
“Skipping primer to save time almost always costs you more later.” — Senior Project Manager, Bucci Paint
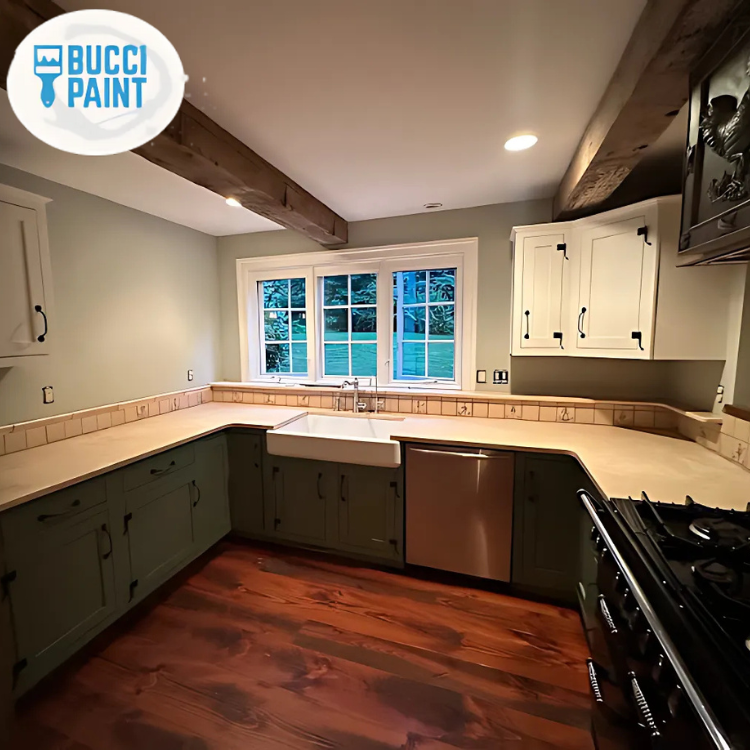
Step 3: Choosing the Right Products and Sheens for Each Room
The paint itself matters more than most people realize. Not just the brand, but the type, sheen, and how it’s matched to the surface and the room’s use.
For homes in Evesham and surrounding towns, we often recommend:
- Flat or matte for ceilings and low-traffic walls (great at hiding small imperfections)
- Eggshell or satin for living rooms, halls, and kids’ rooms (more washable, still stylish)
- Semi-gloss for trim, doors, and cabinetry (durable and easy to clean)
- Specialty products for high-moisture areas like bathrooms and laundry rooms
With South Jersey’s seasonal humidity swings, high-quality acrylic paints and primers help resist peeling, mildew, and premature wear. This is especially important in older homes with varying substrates (plaster, older drywall, patched areas).
Here’s a quick comparison of product choices:
| Area/Use | Economy Paint Only | Professional System (Primer + Topcoat) |
|---|---|---|
| Busy hallway | Scuffs, burnishing in 6–12 months | Holds color and sheen 5+ years |
| Bathroom with shower | Peeling and mildew risk | Moisture-resistant, easy to clean |
| Over repaired drywall | Flashing (uneven sheen) | Uniform finish, repairs disappear |
| Trim and doors | Chipping and yellowing | Hard, durable enamel-like finish |
Example:
A homeowner near the Promenade in Marlton had beautifully updated their kitchen but used a low-cost wall paint with the wrong sheen. After a year of cooking, kids, and pets, the walls were stained and impossible to clean without leaving shiny “burn” marks. We came in, lightly sanded, spot-primed, and applied a premium eggshell designed for high-traffic, washable surfaces. Now, splatters wipe off with a damp cloth without damaging the finish.
CALLOUT: The right product and sheen in the right space can add years to the life of your paint job—and save you money on premature repaints.
Step 4: Professional Application Techniques – Brushes, Rollers, and Clean Lines
Once prep and product selection are squared away, the visible part begins: applying the paint. This is where technique creates that “magazine-ready” finish you notice immediately when you walk into a room.
A professional Residential Interior Painting crew will:
- Cut clean lines along ceilings, trim, and corners using high-quality angled brushes
- Back-roll walls to ensure even coverage and consistent texture
- Maintain a “wet edge” to avoid lap marks
- Apply paint at the manufacturer’s recommended spread rate (not too thin, not too heavy)
- Use the right nap roller covers for the specific wall texture
In Evesham, many homes have a mix of older textured surfaces and newer smooth drywall. Matching roller naps and techniques to each surface is key to avoiding patchy, uneven appearances.
Local example:
In a townhome off Route 70, the homeowner had tried to repaint one wall themselves after a furniture rearrange. Their new wall looked slightly shinier and a different texture than the others, even though it was “the same color.” Our team repainted the entire room, using consistent tools and techniques. The result: uniform color, sheen, and texture across all four walls and the ceiling.
“Two coats means two full coats—applied correctly. Anything less is just touch-up.” — Bucci Paint Crew Leader
CALLOUT: Smooth, even coverage and sharp lines don’t happen by accident. They’re the result of disciplined technique and the right tools for each surface.
Step 5: Integrating Trim, Doors, and Adjacent Work for a Cohesive Look
Freshly painted walls can actually make old trim, doors, and built-ins look worse by comparison. That’s why many Evesham homeowners choose to update these elements at the same time.
Services like Trim and Door Installation and Custom Cabinetry upgrades blend naturally with interior painting projects:
- Replacing dated baseboards and casing with modern profiles
- Adding crown molding for a more finished, upscale look
- Upgrading hollow-core doors to solid or paneled options
- Refinishing or repainting existing cabinets instead of replacing them
In South Jersey’s competitive real estate market, these details can significantly elevate the feel of a home without a full renovation budget.
Case study from Evesham:
A homeowner near Rice Elementary wanted to brighten their first floor before listing the home. Initially, they asked for wall and ceiling paint only. After reviewing options, they decided to add new baseboards and door casings, plus repaint all interior doors in a durable semi-gloss. The transformation was dramatic—buyers at the first open house commented that it “felt like a new build.” The home went under contract within a week.
CALLOUT: Coordinating painting with trim, door, and cabinetry updates is one of the most cost-effective ways to give your home a “full remodel” feel without a full remodel budget.
Step 6: Final Walkthrough, Touch-Ups, and Long-Term Care
The job isn’t finished when the last coat dries. A thorough wrap-up ensures you’re truly satisfied and sets you up for years of easy maintenance.
A professional process typically includes:
- Removing all masking, plastics, and drop cloths
- Reinstalling switch plates, outlet covers, and hardware
- Cleaning the work area and vacuuming or sweeping as needed
- Labeling any leftover paint for future touch-ups
- Conducting a detailed walkthrough with you, room by room
- Addressing any touch-ups on the spot
In Evesham, where many families juggle busy schedules, having a crew that respects your home—keeping spaces usable and clean throughout the project—matters just as much as the final color.
Local example:
A couple in a Willow Ridge home scheduled interior painting while working remotely. They were concerned about disruption and dust. Our team set up daily cleanup routines, kept work areas contained, and walked the homeowners through progress at the end of each day. On the final day, we did a joint walkthrough, created a punch list together, and didn’t consider the job finished until every item was addressed.
“A proper walkthrough isn’t a formality—it’s your chance to make sure the work matches your expectations.” — Bucci Paint Project Supervisor
CALLOUT: The final 5% of the project—cleanup, walkthrough, and touch-ups—is what turns a good paint job into a great experience.
What This Means for Businesses in Evesham, NJ
While this guide focuses on homes, the same principles apply to offices, retail spaces, and other commercial properties across Evesham and South Jersey.
For local businesses, professional Exterior Painting and interior work can:
- Reinforce your brand with consistent colors and finishes
- Improve employee morale and productivity with brighter, cleaner spaces
- Make a strong first impression on customers and clients
- Protect your investment from wear, moisture, and daily traffic
In busy commercial settings—like medical offices along Route 73 or retail spaces near major shopping centers—fast, efficient work with minimal downtime is critical. That often means:
- Night or weekend scheduling
- Careful coordination with other trades
- Durable, washable coatings that stand up to heavy use
- Specialized products for masonry, concrete, and stucco surfaces, paired with Masonry, Concrete, and Stucco Coatings
Many businesses also have outdoor features that need care, including signage, railings, or even wood structures like decks and entryways. Services like Exterior painting, Deck Staining, and Deck Painting help create a cohesive, professional appearance from curb to conference room.
For property managers and owners across Evesham, Marlton, and surrounding areas, partnering with a professional painting contractor who understands local conditions—humidity, seasonal shifts, and building styles—means fewer callbacks, less disruption, and finishes that hold up under real-world use.
Frequently Asked Questions
Q: How long does a typical interior painting project take in an occupied Evesham home?
A: For an average 2–3 room project in an occupied home, most Interior painting jobs take 2–4 days, depending on the amount of prep and repair needed. Extensive drywall repairs, wallpaper removal, or trim updates can add time. A full-house repaint can range from one to three weeks. A professional crew will provide a clear schedule up front, explain which rooms will be worked on each day, and plan around your routines as much as possible. In many cases, homeowners can continue living and working in the home throughout the project with minimal disruption.
Q: Do I really need primer, or can we just use paint-and-primer-in-one?
A: Primer is still crucial in many situations, especially over new drywall, patched areas, water stains, or drastic color changes. While some premium paints are marketed as “paint-and-primer-in-one,” they’re not a true replacement for dedicated primers in challenging conditions. In Evesham homes, we frequently see water stains from past leaks, smoke residue, or patched drywall that will “flash” through without proper sealing. A professional will choose the right primer—stain-blocking, bonding, or drywall sealer—based on the surface, ensuring a uniform, durable finish.
Q: How do I coordinate painting with other projects like flooring or remodeling?
A: Timing is key. If you’re doing larger updates—like new floors, General Remodeling, or Trim and Door Installation—painting should be sequenced to avoid damage and rework. Typically, ceilings and walls are painted after major construction and before final flooring goes in. Trim and touch-ups are often done last. A contractor who offers multiple services under one roof can coordinate these steps efficiently, reducing downtime and protecting your investment.
Q: What about my deck and exterior—should I tackle that at the same time as interior work?
A: Many Evesham homeowners choose to bundle interior and exterior projects for convenience and cost efficiency. If weather allows, a crew can handle Exterior Painting, Deck Repainting, or Deck Staining while another team works inside. This approach minimizes total project time and can sometimes reduce overall costs. However, exterior work is seasonal in New Jersey, so spring through early fall is the prime window. A reputable contractor will help you prioritize based on condition, budget, and timing.
Q: How do I know if my walls need more than just paint—like drywall repair or carpentry?
A: Look for signs beyond basic nail holes: long cracks, bulging seams, soft spots, water stains, or gaps where trim meets the wall. These can indicate underlying issues that paint alone won’t fix. In many Evesham homes, we find settling cracks, poorly installed drywall, or damaged trim around windows and doors. That’s where services like Drywall Install and Repair and Carpentry Services come in. Addressing these issues before painting ensures a smoother, longer-lasting result and helps avoid costly callbacks.
Q: Is it worth repainting cabinets, or should I replace them?
A: Professionally refinished cabinets can dramatically change a kitchen or bath at a fraction of the cost of replacement—especially if the existing layout works well. High-quality products and proper prep are critical here: cleaning, sanding, bonding primers, and durable topcoats designed for cabinetry. In many Evesham homes, updating cabinet color combined with new hardware and fresh walls delivers a “new kitchen” feel without a full remodel. A contractor experienced with Custom Cabinetry and finishing can help you decide based on the condition and style of your current cabinets.
Q: How often should interiors be repainted in a South Jersey home or business?
A: It varies by space and traffic. In most Evesham homes, main living areas hold up 5–7 years with quality products and proper prep. High-traffic zones like hallways, kids’ rooms, and entryways may need freshening every 3–5 years. Commercial spaces, especially retail or medical, often repaint more frequently to maintain a clean, professional appearance. Using durable coatings and appropriate sheens can significantly extend the life of the finish, reducing long-term maintenance costs.
Ready to Get Started?
Interior painting is one of the most effective ways to transform your home or business in Evesham without a major renovation. Whether you’re refreshing a single room or planning a whole-house update, the right process—from prep to finish—determines how good it looks and how long it lasts.
Seasonal swings in New Jersey mean there are better windows for certain types of work, and schedules fill quickly during peak times. If you’re considering a project for this year, it’s smart to start the conversation early. That gives you time to choose colors, coordinate with any remodeling or Trim and Door Installation, and lock in dates that work for your schedule.
Bucci Paint has been serving South Jersey homeowners and businesses for years with a full range of services—from Residential Interior Painting and Exterior painting to drywall repair, trim, and more. If you’re ready for walls, ceilings, and trim that truly reflect the way you want your space to feel, we’re here to help you plan it the right way.
About Bucci Paint
Bucci Paint is a locally owned painting and remodeling contractor based in Evesham, NJ, serving homeowners and businesses across South Jersey. Our team specializes in detailed interior and exterior finishes, Drywall Install and Repair, Carpentry Services, and Molding, Trim, and Flooring Installation. With a focus on craftsmanship, cleanliness, and clear communication, we’ve built long-term relationships throughout the community. Learn more about our services and see recent projects at https://buccipaint.com/.